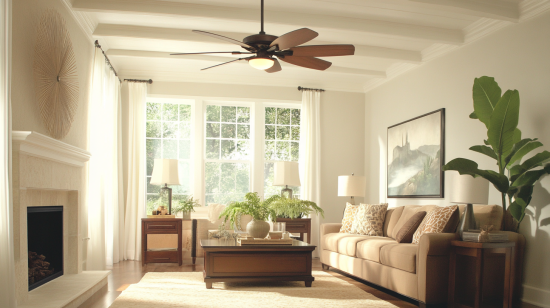
Littleton 42 in. LED Indoor White Ceiling Fan with Light Kit
- The Littleton 42 in. ceiling fan features a white finish with 4 reversible white/bleached oak blades. The schoolhouse light kit has a frosted glass globe shade for a traditional look that complements a variety of decor styles. This fan is ideal for rooms up to 10 ft. x 10 ft. in size and offers a 3-speed reversible motor to keep you comfortable in any season. It will provide up to 2934 CFM airflow, comes with a pull chain for ease of operation and a 9-Watt LED bulb for your convenience.
- Highlights
- 4 reversible white/bleached oak blades make it easy to change your decor without replacing the entire unit
- White finish for housing and light fixture
- Schoolhouse light kit with frosted glass
- Pull chain offers simple operation
- 2,934 CFM airflow
- Standard flush-mount installation
- Indoor use, for small room sizes up to 10 ft. x 10 ft.
- Light kit included
- 9-Watt LED bulb included
- 15-year motor warranty; 1-year other parts
$44.97
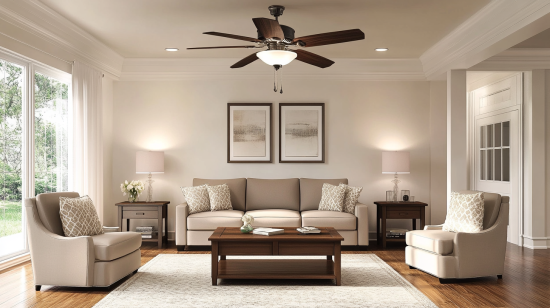
Are you looking to add a stylish and functional ceiling fan to your home? The Hampton Bay Littleton is one of the most popular options on the market today. In this comprehensive buying guide, I’ll provide you with everything you need to know about this fan before making your purchase.
Key Features of the Hampton Bay Littleton
The Littleton has several great features that make it stand out:
- Reversible motor – This allows you to change the direction of the blades to either pull air upwards during summer or push it down in winter. Most fans have this, but it’s still nice to have.
- LED light kit – An integrated 18W LED light kit provides bright, energy efficient lighting. The frosted glass helps diffuse the light.
- 3 speeds – Low, medium and high settings allow you to get the right airflow for your needs. Many fans only have 3 speeds.
- Pull chain controls – It comes with pull chains to control the fan and light separately without a remote. Chains are common on basic fans.
- Blade pitch – The blades are optimized with a 13 degree pitch to maximize airflow efficiency. Not all blades are created equal!
- 5 reversible walnut/cherry blades – The reversible blades allow you to choose between a warm walnut tone or a rich cherry finish to match your decor.
- Close-to-ceiling – At only 11.25 inches tall, this fan hangs closer to the ceiling than most to work in rooms with lower ceilings.
- Damp rating – With a damp rating, you can even use this fan outdoors in a covered patio or porch. Not intended for direct outdoor exposure though.
- Universal mounting – It comes with both a downrod mount and close-to-ceiling mounting for flexibility. This makes installation easier.
Step-by-Step Installation Guide
Installing the Littleton ceiling fan is a straightforward process, though it helps to know what you’re doing ahead of time since electrical work is involved. Here are the step-by-step installation instructions:
- Turn off power at the breaker. Safety first!
- Identify the ceiling joist in your room to ensure the fan will be securely mounted.
- Attach the mounting bracket to the ceiling and joist using the included screws. Make sure it is tight and secure.
- Next, assemble the downrod that connects the fan to the ceiling. The length is adjustable to your room height.
- Feed the wires from the ceiling through the downrod assembly and make all electrical connections including grounding. This part requires electrical knowledge.
- Lift the fan motor assembly and attach it to the mounting bracket via the downrod. Be careful, the fan itself can be heavy!
- Attach each blade to the motor housing using the included blade screws. Try not to drool over your new fan!
- Mount the included LED light kit using the provided screws. Don’t over tighten.
- Install light bulbs into the sockets. Halogen bulbs are recommended.
- Do a final check that all screws, wires, and blades are secure. Give a test tug on each blade.
- Turn the power back on and test your beautiful new ceiling fan! Make sure the blades spin smoothly and light works.
Always consult the included instruction manual for full installation details. Consider hiring an electrician if you are uncomfortable working with electrical wiring.
Where to Buy the Hampton Bay Littleton
The Littleton is one of Home Depot’s exclusive Hampton Bay ceiling fan models, so it can primarily be found at Home Depot stores or on their website. Here are some purchasing options to consider:
- Check for availability at your local Home Depot. You can often take it home same day if in stock.
- Order online at HomeDepot.com for delivery or in-store pickup. Online prices are sometimes discounted.
- Keep an eye out for coupon codes and sales if buying online. Sign up for the Home Depot email list to get notifications.
- Consider ordering on eBay or Amazon as well, just double check it is being sold by an authorized dealer and not a third party.
- Hampton Bay offers a 1 year warranty when purchased from authorized retailers like Home Depot or Hampton Bay’s website.
Ideal Room Size
The Littleton is designed for rooms up to 300 square feet. This makes it well-suited for most medium bedrooms, home offices, living rooms, and other standard residential spaces.
Larger family rooms, great rooms, and open concept spaces may require a larger ceiling fan with greater airflow capacity. Always consult the manufacturer room size guidelines and measure your space before purchasing.
Cleaning and Maintenance
Like any fan, the Littleton will collect dust over time. Here are some tips for keeping it clean:
- Use a microfiber cloth or soft brush to dust the blades, motor housing and light fixture. This can be done as needed.
- Wipe the blades periodically with a damp cloth to remove any built up grime or oils. Be gentle.
- Use a small vacuum crevice tool to remove dust build up inside the motor housing.
- Clean the glass light fixture with a standard household cleaner and rag. Ammonia-free cleaners are safest.
- You should not need to lubricate or oil the fan. The motor is designed to be maintenance free.
- Inspect the mounting, brackets, and downrod yearly to check for wear or corrosion. Replace any damaged parts.
- Clean and spin the blades gently to check for clicking sounds or wobbling, a sign parts need replacement.
Warranty Information
The Littleton ceiling fan comes with a 1-year limited warranty from Hampton Bay, valid from the date of purchase when installed in residential settings.
This warranty covers defects in materials and workmanship only. It does not cover normal wear-and-tear, improper installation, accidents, or environmental factors.
Always keep your receipt or proof of purchase to provide with any warranty claims. You will need to work directly with Hampton Bay’s customer support for any warranty issues.
Cost Breakdown
As one of Hampton Bay’s more affordable ceiling fans, here is a breakdown of costs:
- MSRP: $159
- Typical Store Price: $99 – $129 at Home Depot
- Sales Price: Can sometimes be found for $79 – $99 during promotions or clearances.
- Warranty Service: Parts and labor covered for 1 year.
- Professional Installation: Optional, costs $129 and up depending on electrician.
- Additional Accessories: Extra downrod ($10), ceiling light kit ($25), wall controls ($50+)
Overall, for a ceiling fan under $100 the Hampton Bay Littleton provides great value compared to similar models from other brands.
Energy Efficiency
This fan carries an Energy Star certification, meeting EPA standards for energy efficiency and cost savings.
Features like the integrated LED light, reversible air flow, and three fan speeds allow you to adjust operation based on your cooling needs and reduce electricity usage.
Using your Littleton ceiling fan to circulate air can allow you to raise your thermostat in summer and lower it in winter without sacrificing comfort. This can yield significant energy savings over time!
Using Outdoors
The Hampton Bay Littleton has a damp rating, meaning it can work in outdoor covered spaces like porches and patios. However, it is not designed for direct outdoor exposure.
If installing on a covered porch:
- Make sure the fan is fully protected from rain, snow, and moisture. Even sprinklers could damage it over time.
- Use a GFCI outlet or circuit breaker for safety near water.
- Consider weather-resistant outlet covers and light bulb covers.
- Inspect the fan routinely for moisture or insect damage.
- Take down the fan and store inside if temperatures dip below freezing.
While you can install it on a porch, this fan still provides best performance indoors. Fully outdoor ceiling fans would be better suited for uncovered decks or pergolas.
Product Dimensions
Here are the key dimensions and specs for the Hampton Bay Littleton model:
- Fan diameter – 44 inches
- Blade span – 44 inches tip to tip
- Blade pitch – 13 degrees
- Height (from ceiling) – 11.25 inches
- Downrod length – 4.5 inches (optional longer downrods available)
- Motor RPM – 153 revolutions per minute
- CFM – 4650 cubic feet per minute airflow
- LED light – 18 watts, 1750 lumens, 3000K color temperature
Always measure the room you plan to install it in to ensure these dimensions will fit appropriately. Also account for blade span clearance.
Troubleshooting Guide
Like any electrical fixture, issues can pop up on occasion with the Littleton. Here are some troubleshooting tips if your fan stops working:
- Check the circuit breaker and any wall switches to make sure power is on.
- Inspect the remote or pull chain controls for physical damage or disconnection.
- Test the wall control and manual switches to isolate the issue.
- Check that the blades spin freely without obstruction.
- Inspect the mounting bracket and downrod connections.
- Make sure all electrical connections are still secure, including ground wiring.
- LEDs have a long life, but replace any bulbs that look burnt out.
- Make sure blades and motor are tightly fastened and socket adapters are not loose.
- If issues persist, check manufacturer warranty for repair or replacement parts.
Getting a new ceiling fan going can be frustrating, but methodically troubleshooting the various components and wiring can usually uncover the underlying problem.
Compatible Light Bulbs
The integrated LED module is designed to last 20+ years and likely won’t need replacement over the fan’s lifetime. However, if you ever need to replace the LED assembly, compatible replacement kits can be purchased from Hampton Bay. Contact their customer service for recommended parts.
If you install an optional ceiling light kit, you’ll need traditional screw-in bulbs. Always consult the user manual, but these are safe options:
- CFL bulbs: 13W or less
- Incandescent bulbs: 60W or less
- Halogen bulbs: 53W or less
Choose the right wattage and shape (A19, G25, etc) to match the light fixture. Again, LED bulbs will provide the best efficiency and longest life.
Replacing Light Kits
One advantage of the Littleton is the LED module is integrated into the motor housing for a streamlined look. But if you wish to swap it out for a ceiling light fixture, here is the process:
- Turn off power to the fan at the breaker before proceeding. Safety first!
- Remove the mounting screws holding the LED module onto the motor housing. Caution, it will be heavier than it looks.
- Disconnect the wire connectors to completely remove the LED module. You may need to cut zip ties.
- Install the new ceiling light kit using the screws included with the kit. Drilling may be required.
- Connect the wiring from the fan to the new light kit, matching cable colors. Additional wire nuts may be needed.
- Mount the glass fixture cover and install the recommended bulbs. Halogen bulbs work well.
- Turn the power back on and test that your new ceiling light operates properly.
Replacing the integrated LED with a decorative ceiling light kit upgrades the look, though make sure to choose a compatible, low-wattage fixture to avoid electrical issues.
Remote Control Options
The Hampton Bay Littleton does not come with a remote control included. However, you can purchase compatible remote control kits to add this functionality:
- Basic remote control ($15) – Operates the 3 speeds and light on/off. No dimming.
- Wall control ($50) – Wired controller mounts to a wall with full fan/light features.
- WiFi smart control ($70) – Connects the fan to a smartphone app for voice control & scheduling.
- Ceiling fan remote ($40) – Mounts in place of a standard wall switch for wireless control.
- Fan-specific universal remotes ($30) – Compatible with most Hampton Bay fans.
To install a remote control, you will need basic wiring knowledge. The receiver mounts inside the fan canopy. Batteries power wall controls. Consider hiring an electrician if unfamiliar.
Available Finishes
The Littleton comes in two classic finishes – Brushed Nickel or Oil Rubbed Bronze. Both feature a simple elegance perfect for most home décor.
The blades can be swapped between warm walnut or rich cherry wood tones. This provides flexibility to coordinate with your existing furniture and cabinetry.
While only two finishes, these versatile options complement a wide range of style from modern to farmhouse. Change the blades as your room decor evolves over time.
Reversing Airflow
One key advantage of a reversible ceiling fan is that you can change the direction of airflow based on the season:
Summer: Spin the blades counterclockwise to create a cool downward breeze
Winter: Spin the blades clockwise to circulate warm air near the ceiling.
To reverse the direction on the Littleton:
- Locate the reverse switch on top of the motor assembly.
- When fan is off, slide the switch to the opposite position. An audible click indicates it engaged.
- Turn the fan back on to test the airflow direction changed.
- Adjust the blades if needed to achieve optimal airflow for the season.
Reversing the motor is an easy process. Just be sure the fan has come to a full stop before toggling the switch to prevent damage.
How to Balance the Blades
If your Littleton begins to wobble or make noise when running, the most common cause is blade imbalance. Here is how to properly balance the blades:
- Start with the fan off and locate the balancing kit included in the box.
- Clip the balancing strips onto a blade parallel to the edge, starting near the center.
- Power the fan on and see if the wobble improved. If not, move the strip toward the tip of blade.
- Once corrected, evenly space additional strips to balance the weight.
- Repeat this process for each blade as needed to achieve smooth operation.
Use the removable balancing strips to fine tune the weight distribution without permanently altering the blades. This prevents wobbling at high speeds.
Airflow Efficiency
An important spec for comparing fans is CFM – cubic feet per minute of airflow. The higher the CFM, the more air power.
The Littleton produces 4650 CFM on the highest speed setting. This places it in the range of a mid-sized fan appropriate for rooms up to 300 square feet.
For large, open concept rooms, you may want a fan with 7000+ CFM or more. But for average bedrooms and living rooms, the Littleton provides sufficient airflow to keep the space comfortable.
Getting Replacement Parts
With a 1-year warranty, you should be covered for defective parts that fail in normal use. But even out of warranty, Hampton Bay has many replacement parts available for purchase if components of your Littleton get damaged or worn out.
Some common replacement parts include:
- Fan motor
- LED lighting module
- Pull chain switches
- Ceiling light kits
- Blade balancing kits
- Mounting bracket
- Downrod
Check the Hampton Bay website or contact their customer service about ordering replacement parts for your model. They have an extensive catalog of repair parts to choose from to fix issues and keep your fan running for years.
How to Reset the Fan
If your Littleton is unresponsive or acting erratic, you may need to reset it. Try the following:
- Locate the small reset button on the top of the motor assembly.
- Press and hold the reset button for 10-15 seconds until the light blinks.
- This will clear any faulty settings and reset to factory defaults.
- Reconfigure any settings like fan direction, speed, and lighting.
- If issues persist, disconnect power at the breaker, wait 1 minute, then reconnect power to reboot.
Resetting the fan essentially reboots the electronic controls and motor. With the settings cleared, normal function should resume. Just be cautious when pushing the reset button near the spinning blades!
Final Thoughts
I hope this comprehensive ceiling fan buying guide for the popular Hampton Bay Littleton provides all the details you need before taking home this top-selling model. It really offers an unbeatable value for a stylish, mid-size fan under $100. Reversible blades, an integrated LED light, and reliable operation make it a great addition to almost any room.
Just be sure to follow the included instructions closely for installation and refer to my tips above if you need troubleshooting assistance down the road. Proper ceiling fan maintenance will keep your Littleton spinning quietly for years of energy efficient comfort. Let me know if you have any other questions – I’m happy to help!